 Save
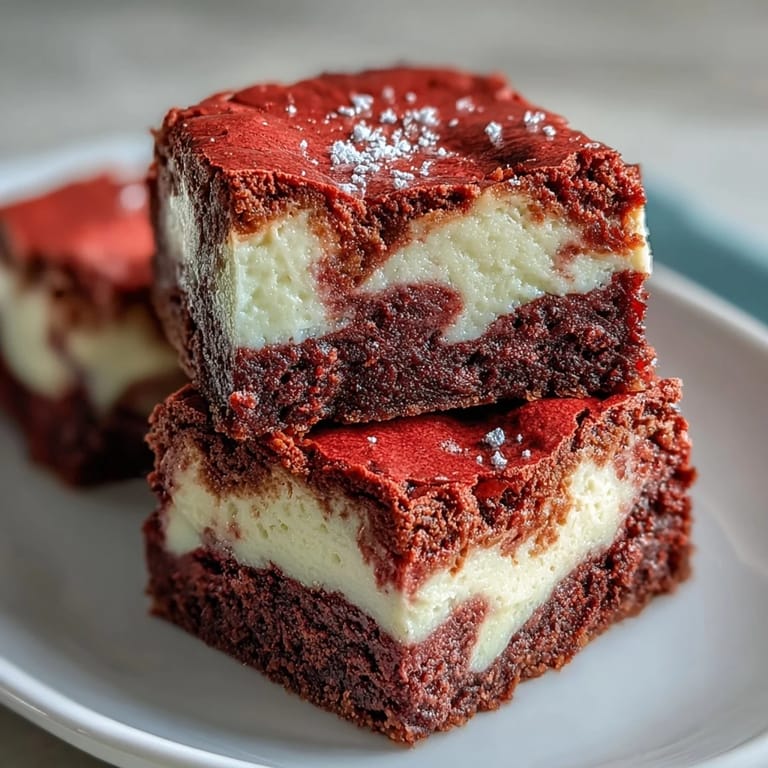
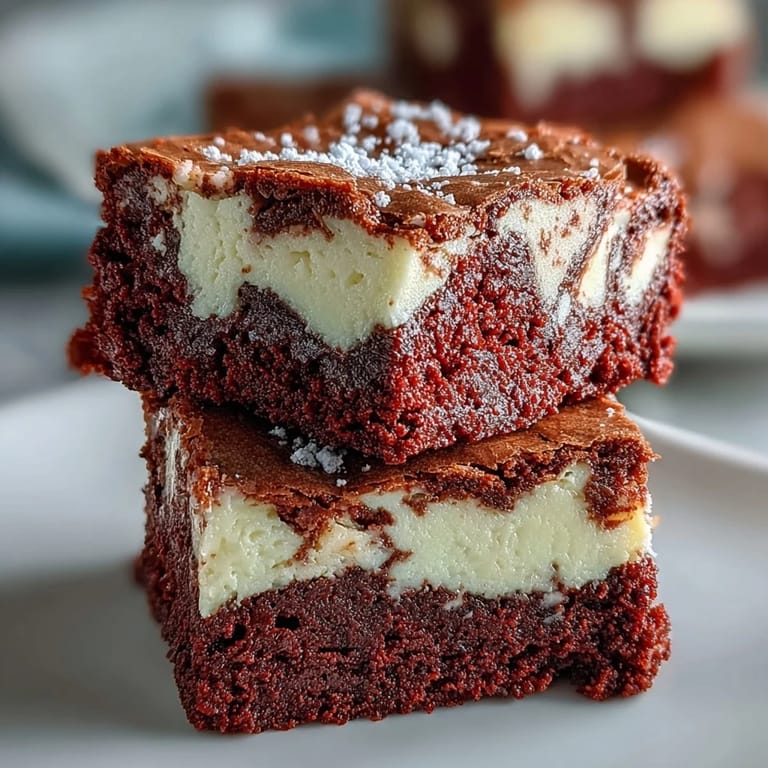
Save The first time I made these, my kitchen looked like a crime scene with red streaks everywhere, but one bite of that marbled cheesecake-brownie magic made every paper towel worth it. My roommate walked in mid-swirl, raised an eyebrow at the electric mixer covered in pink splatters, and immediately asked if there would be enough for her dinner plans that night.
I brought a batch to my sisters Valentine gathering, and her father-in-law, who usually claims chocolate is too rich, went back for thirds while pretending to help cleanup the dessert table. Now they are my requested contribution for every family celebration, birthday or not.
Ingredients
- Unsalted butter: Melted completely creates that dense fudgy texture we crave in brownies, and salted butter throws off the delicate balance here
- Red food coloring: Gel coloring gives you that vibrant ruby hue without thinning the batter, but liquid works in a pinch
- Cream cheese: Room temperature is non-negotiable here, or you will end up with tiny lumps that ruin the silky swirl
- Cocoa powder: Unsweetened Dutch-processed gives the deepest chocolate flavor without making these too bitter
Tired of Takeout? 🥡
Get 10 meals you can make faster than delivery arrives. Seriously.
One email. No spam. Unsubscribe anytime.
Instructions
- Get your oven ready:
- Precise temperature matters for these dual-texture beauties, so use an oven thermometer if you are unsure
- Make the red velvet batter:
- Whisk until just combined, because overmixing develops too much gluten and makes brownies cakey instead of fudgy
- Reserve some batter:
- That quarter cup of red velvet batter creates those dramatic swirls on top, so do not skip this step even if it seems fussy
- Prepare the cheesecake layer:
- Beat until absolutely smooth, stopping to scrape down the bowl so every bite is uniformly creamy
- Layer and swirl:
- Drop spoonfuls of red batter across the cheesecake layer, then drag a knife through in one continuous motion for those marble patterns
- Bake until just set:
- The center should still have a slight wobble, because residual heat finishes the cooking while they cool
- Patience is everything:
- Chilling completely makes clean cuts possible, otherwise you will end up with messy edges and streaks everywhere
 Save
Save These became my go-to comfort food during a particularly rough winter, when something that looked celebratory but tasted like home felt exactly right. My neighbor started knocking on my door whenever she saw my oven light on through the kitchen window.
Making the Perfect Swirl
I used to make my swirls too elaborate, ending up with muddy colors instead of distinct marbling, until a pastry artist friend showed me that fewer, longer strokes create better patterns. Now I do four or five zigzag lines across the pan, then drag the knife perpendicular once for that professional look.
Room Temperature Ingredients
Years of baking taught me that rushing this step ruins everything, especially with cheesecake components where emulsification matters so much. I now set out all my dairy and eggs at least an hour before baking, turning prep time into a chance to sip coffee and mentally organize my kitchen.
Storage and Serving
These actually taste better after chilling overnight, as the flavors deepen and the texture sets into that perfect dense creaminess. Room temperature serving brings out the fudgy brownie notes, while chilled highlights the tangy cheesecake layer.
- Cut these with a hot knife for clean edges, wiping the blade between each slice
- Bring them to room temperature for 30 minutes before serving for the best texture
- Freeze individual squares wrapped tightly for those sudden dessert emergencies
 Save
Save There is something genuinely satisfying about slicing into that ruby and cream marble, revealing the perfect layers you created. Hope these bring as much joy to your kitchen as they have to mine.
Recipe Help & Answers
- → How do I get clean swirls?
For distinct swirls, add dollops of the reserved red velvet batter over the cheesecake layer. Use a knife or skewer to gently create patterns, being careful not to overmix the two layers.
- → Can I make these ahead of time?
Absolutely! These brownies are excellent for making in advance. Once cooled completely, refrigerate them in an airtight container for up to 5 days. They often taste even better the next day.
- → Why is chilling important before cutting?
Chilling the brownies for at least two hours (or longer) allows the cheesecake layer to firm up properly. This ensures clean, precise cuts and prevents the brownies from crumbling, giving you neat squares.
- → What if I don't have red food coloring?
While the red food coloring gives the signature color, it doesn't affect flavor. You can omit it for a chocolate cheesecake brownie, or use a natural beet powder for a subtle reddish hue if preferred.
- → How can I ensure my cheesecake layer is smooth?
For a lump-free cheesecake layer, ensure your cream cheese is completely softened to room temperature. Beat it thoroughly before adding other ingredients, and then mix until just combined, avoiding overbeating.